Very recently when I visited the JS Channel conference sometimes later on July, 2016 and it started with something called ‘bots’ in their Keynote followed by a pretty cool demonstration of how does it work and what is it. Kind of gave me a boost to learn it. I came back home and started researching on what are bots and how can we thrive its benefits.
So I started looking into Facebook which provides pretty good developer handy tools to get your job done in no time. There I came up with something known as Facebook messenger bot. So let me take you on a ride into the world of bots. The agenda of this blog would be to give you some idea about what bots are and how is a bot functioning.
So an internet bot also known as a web robot or simply a bot is a software application that runs automated tasks over the internet. Typically bots perform tasks that are both simple and structurally repetitive without any human intervention. Now a days bots play a major part in any kind of web interaction or deployment. It reduces human efforts to carry on repetitive tasks.
So let us try creating a weather bot which will let you know the forecast of a place because I guess like me my readers are kind of too busy to spare 2 minutes to google it. So lets start of by creating a Facebook messenger bot.
Make a git clone of this repository. You should be having npm (node package manager) and node js installed in your machine. Once you clone the repository visit the directory Facebook_Bot2. Now do npm install. This will install all the dependencies related to express that we would be needing to make a GET and a POST request. Once all your required modules get installed you need to run the command npm run dev. This will basically run your nodejs server. Next we will be needing a tool called ngrok. This would basically tunnel your localhost to the internet. You can also deploy your application on cloud services for example Heroku and use the url provided by the service for callback url in webhook. To run ngrok in your system just type in your terminal npm run ngrok. Your terminal will look something like this
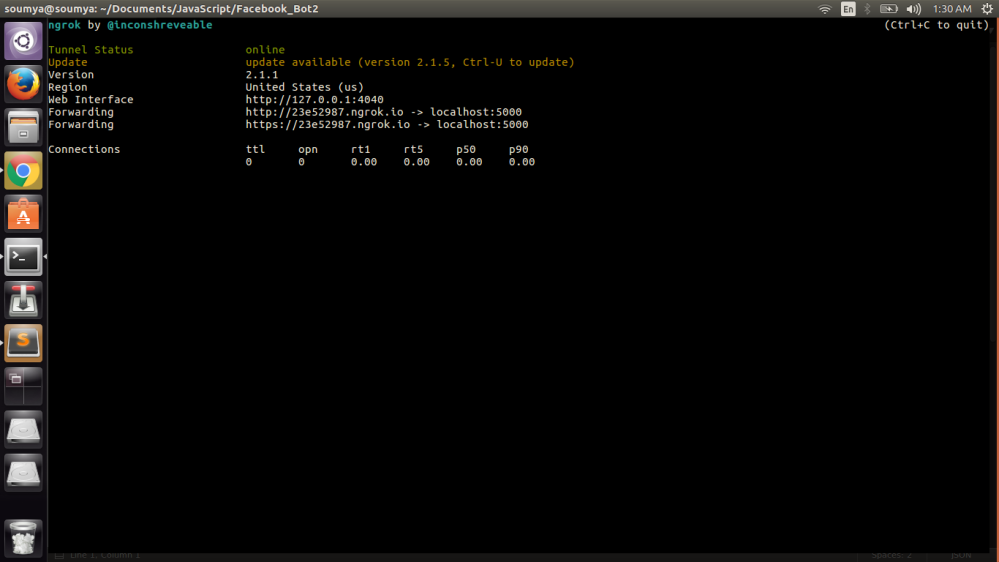
As you can see that our localhost is running on port 5000 which is now available as a domain with the help of ngrok. Keep the URL with https in handy. We will be needing it later on.
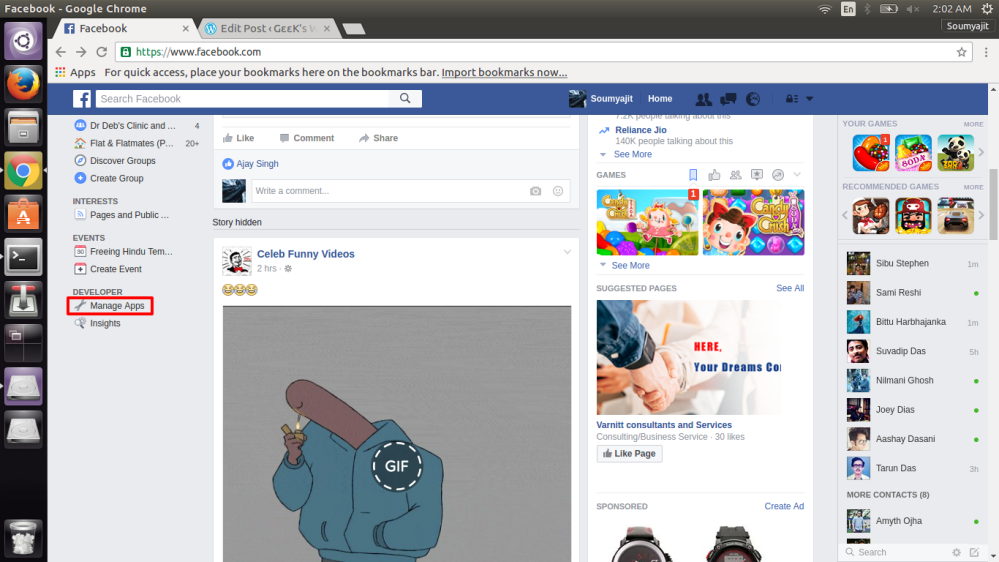
Next login to facebook and create a page of your own. Once that is done create a facebook app. for creating a facebook app login to your facebook account. In the extreme left below you will find the Developer section. Under Developer section you will find the option ‘manage your apps’. Click on it.
This will take you the developers page in facebook which would look something like this
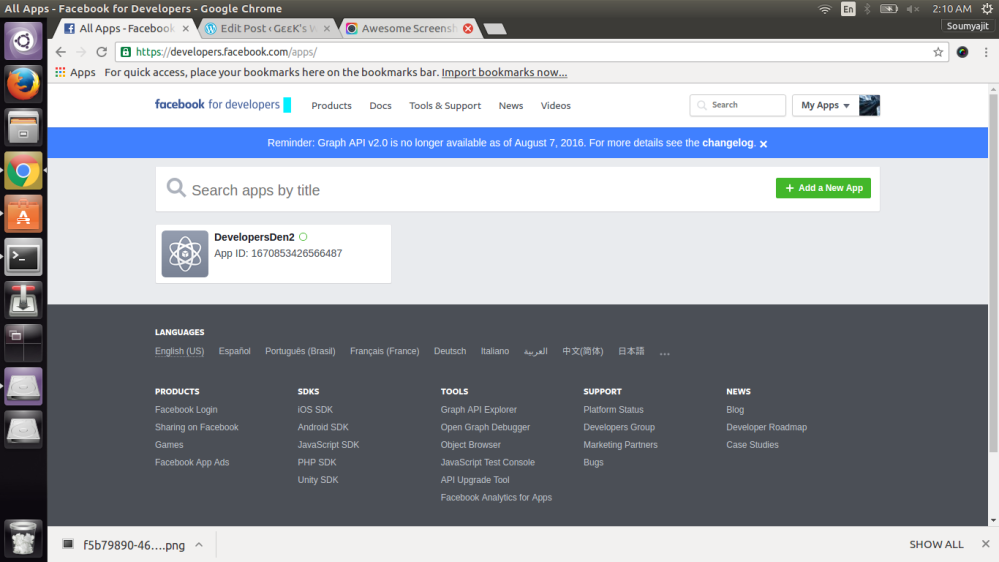
Over here you need to click on the option Add a New App as shown in the image.
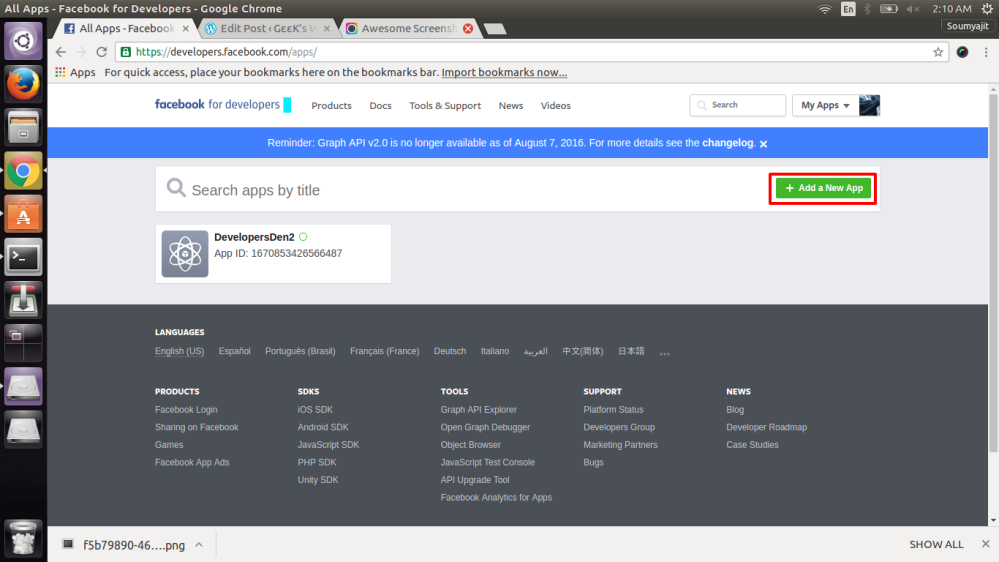
When you click on ‘Add a New App’ you will be asked to enter the name of the application and your email address. You will also be asked to choose a category for which I have chosen ‘Apps for pages’
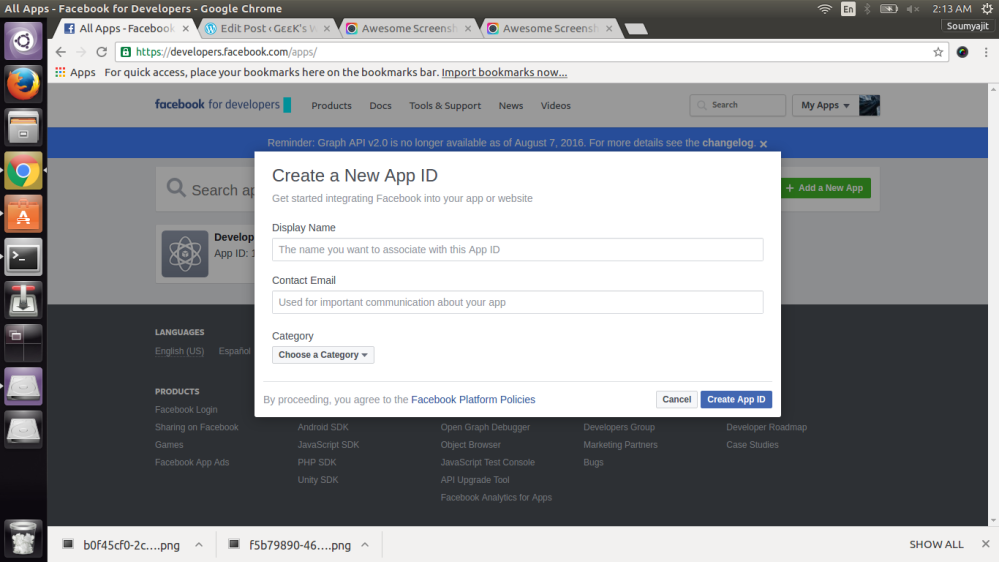
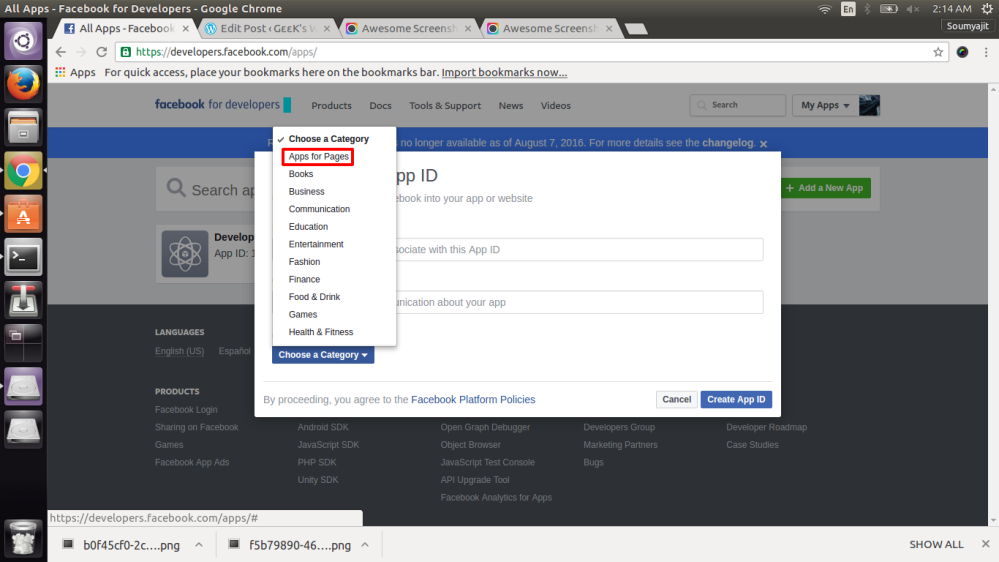
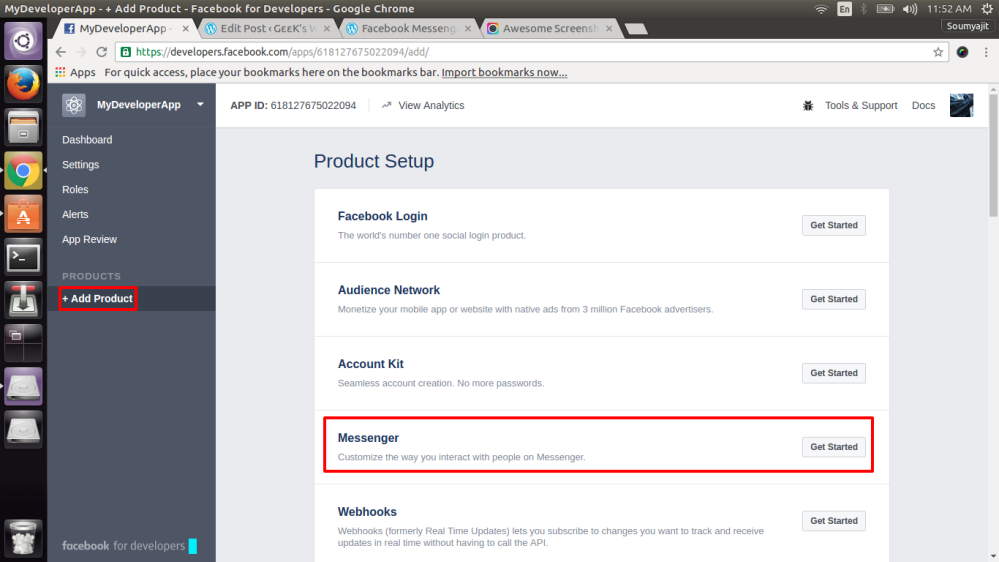
Then click on ‘Create App ID’ once you are done with entering all the information. When the app is create you need to add a feature to your application. You can do this by clicking the ‘Add Product’ button present on the left side of the screen and next you can click on the ‘Get Started’ button to start with your messenger bot application.
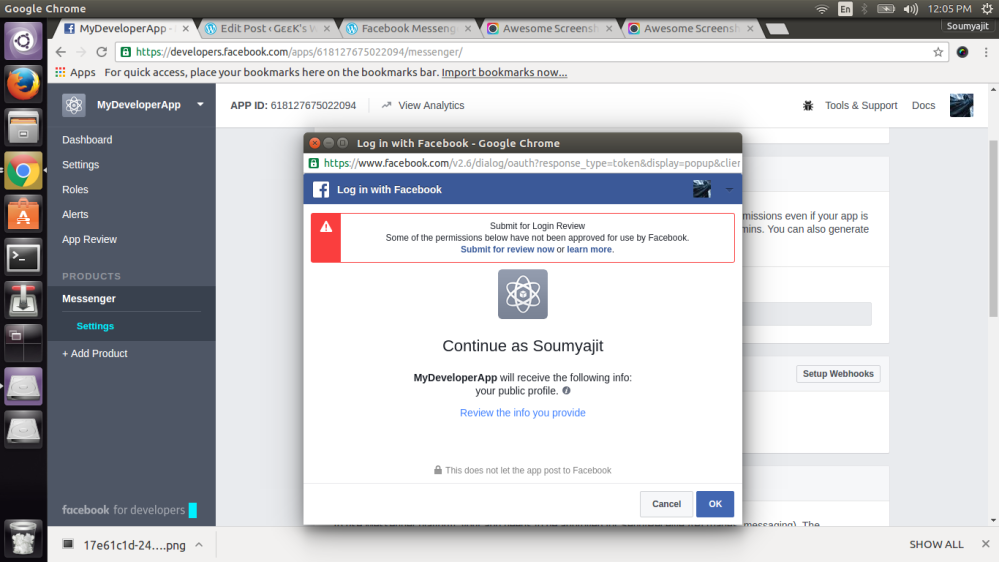
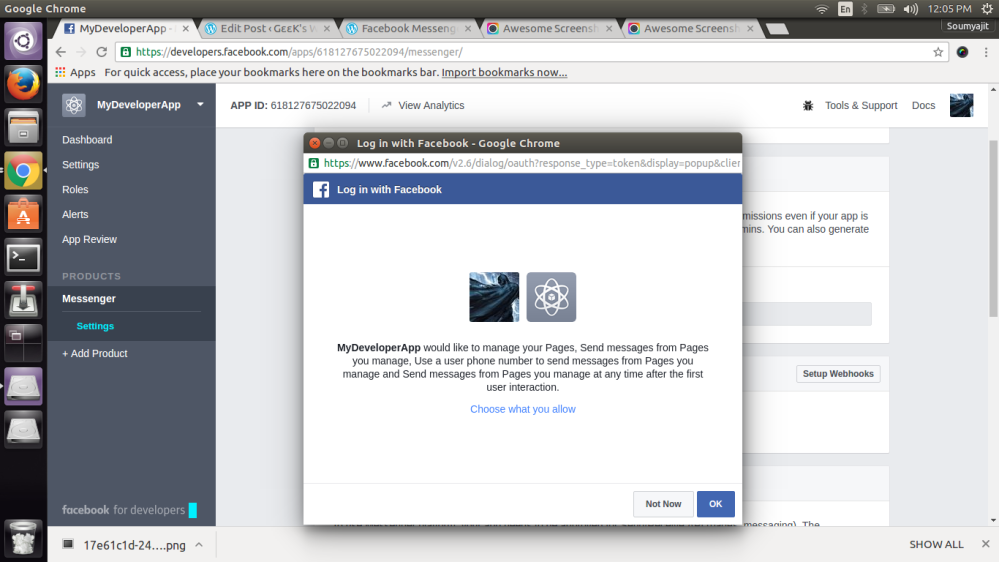
So once you get started, in the facebook messenger page you will be asked to select a page and corresponding to the page a page access token will be generated for you. A page token is needed to start using the APIs. This page token will have messenger permissions even if your app is not approved to use them, though in this case you will only be able to message the app admins. Follow the corresponding screenshots to generate the page access token

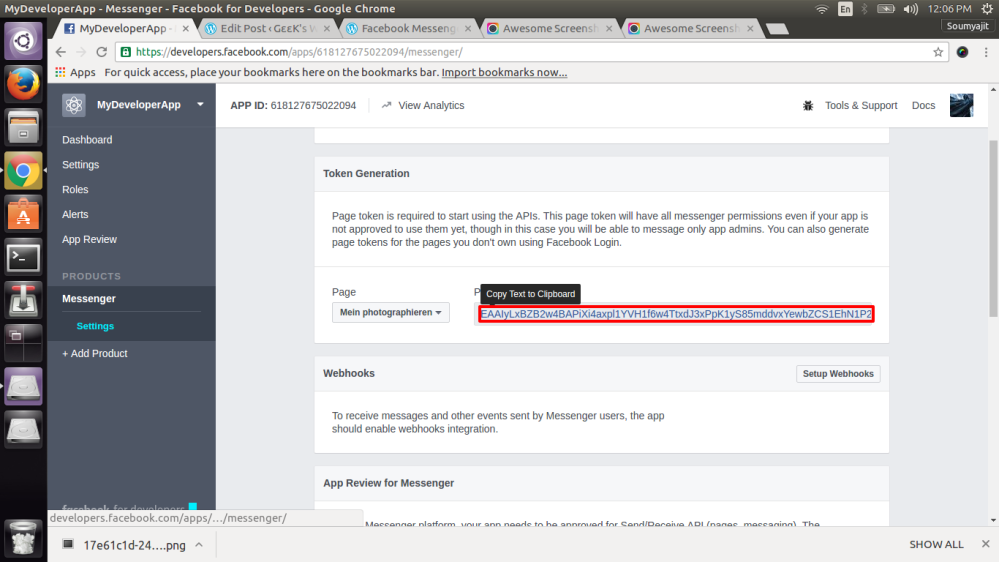
Keep the page access token in handy. You will be needing this to authorise your page messenger bot to carry out request and response. Next up we will be setting the Webhooks. Now this plays a crucial part in your application. We will be needing the webhook so that messages and other events can be received from the users. For this we would need to integrate a webhook with the corresponding app.
Before plunging into setting webhooks I would like to enlighten you with the concept of webhooks at first. Webhooks are user defined callbacks. They are usually triggered by some event such as pushing a code to a repository. When the event occurs the source site makes an HTTP request to the URI configured for the webhook. Users can configure them to cause events on one site to invoke behaviour of another. Since it is an HTTP callback it can be integrated to any web services without adding any added infrastructure.
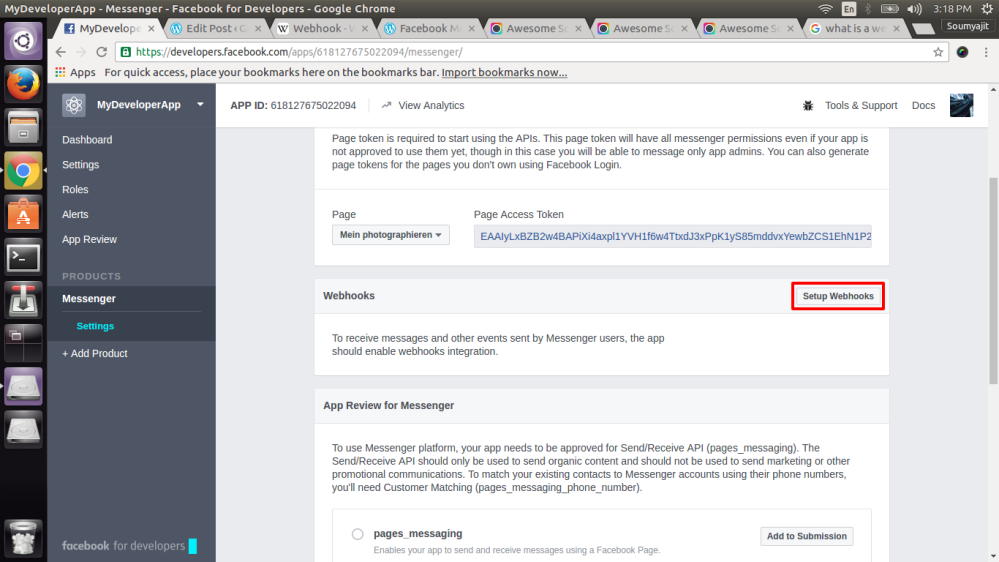
So, you can create a webhook by clicking on the ‘Setup Webhooks’ button.
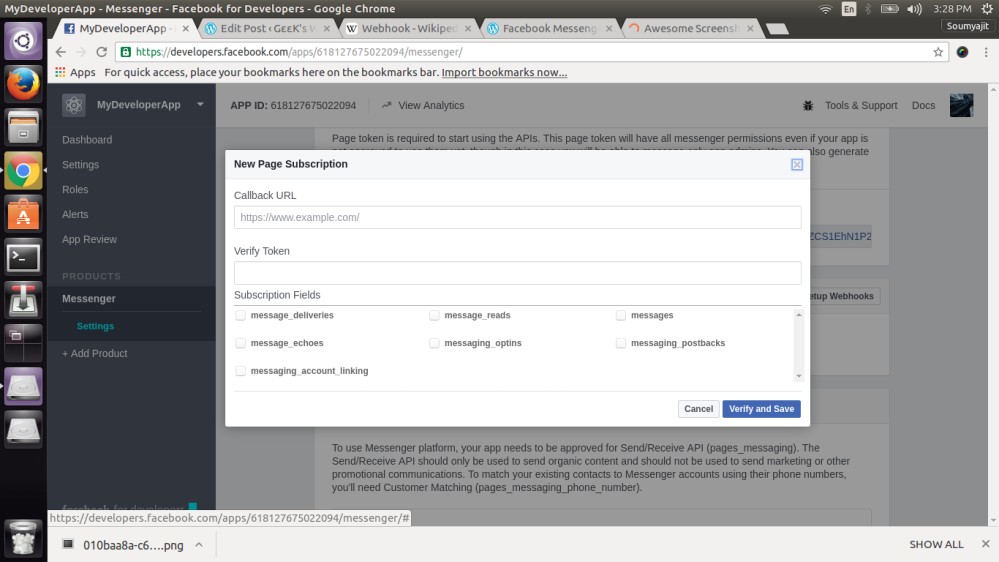
Now in the callback url insert the forwarding url that is given by ngrok in the terminal with an endpoint ‘Webhook’, followed by the name of the token. Verify and save the settings of the webhook.
Next subscribe the webhook to your page.
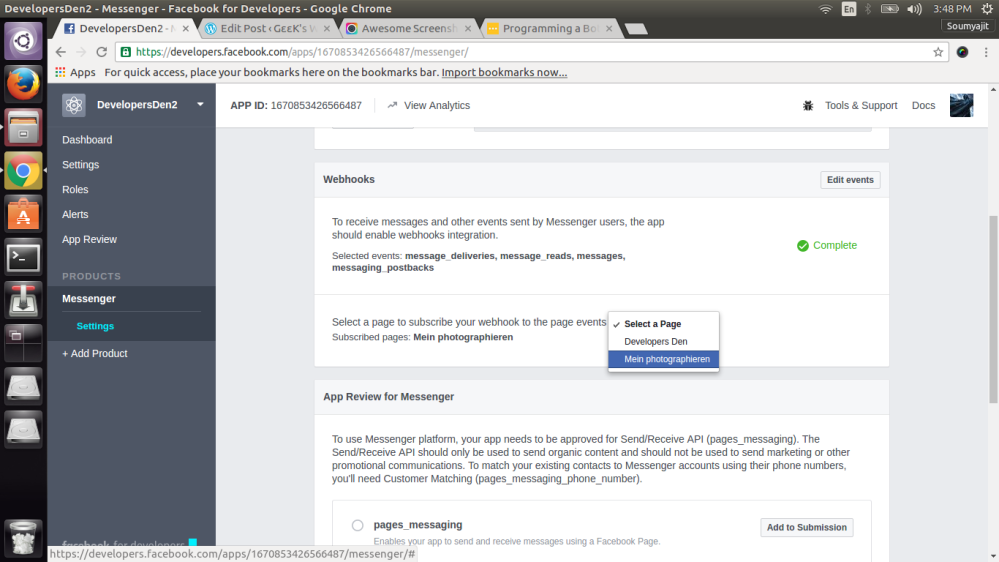
Next, you’ll need to attach your bot to the page you set up. This allows you to communicate with the bot by visiting the page and clicking “Message”. In Token Generation, generate a page access token, by selecting the page you created. In terminal, execute the following command, replacing with the page token:
curl -ik -X POST “https://graph.facebook.com/v2.6/me/subscribed_apps?
access_token="
Also update your index.js file (on line 53) with this page token so you can send messages back:
var access_token =’’;
At this point, your bot is subscribed to updates for the page, which means that when someone messages the bot from the page, you’ll get the notification.
When you send a message to WeatherBot, you’ll see WeatherBot echo it back. The server will also indicate that it received the message.
The relevant code that’s handling the message receiving is here:
// respond to post calls from facebook
app.post('/webhook/', function (req, res) {
  var messaging_events = req.body.entry[0].messaging;
  for (i = 0; i < messaging_events.length; i++) {
    var event = req.body.entry[0].messaging[i];
    var sender = event.sender.id;
    if (event.message && event.message.text) {
      var text = event.message.text;
      console.log('You sent the message', text);
      sendTextMessage(sender, "Text received, echo: "+
text.substring(0, 200));    }
  }
  res.sendStatus(200);
});
Sending a text message looks like this:
var request = require('request');
function sendTextMessage(sender, text) {
  var messageData = {
    text:text
  }
  request({
    url: 'https://graph.facebook.com/v2.6/me/messages',
    qs: {access_token:token},
    method: 'POST',
    json: {
      recipient: {id:sender},
      message: messageData,
    }
  }, function(error, response, body) {
    if (error) {
      console.log('Error sending message: ', error);
    } else if (response.body.error) {
      console.log('Error: ', response.body.error);
    }
  });
}
Now let us make our bot do something more
Weatherbot
The bot should respond with the current weather in a particular location. We’ll use Yahoo weather as our API. The endpoint we’ll be using is this gnarly-looking URL:
var weatherEndpoint = ‘https://query.yahooapis.com/v1/public/yql?
q=select%20*%20from%20weather.forecast%20where%20woeid%20in%20(select%20
woeid%20from%20geo.places(1)%20where%20text%3D%22' + location + ‘%22)&
format=json&env=store%3A%2F%2Fdatatables.org%2Falltableswithkeys’;
Replace the POST response (the /webhook listener) with this:
app.post('/webhook/', function (req, res) {
  var messaging_events = req.body.entry[0].messaging;
  for (i = 0; i < messaging_events.length; i++) {
    var event = req.body.entry[0].messaging[i];
    var sender = event.sender.id;
    if (event.message && event.message.text) {
      var location = event.message.text;
      var weatherEndpoint = 'https://query.yahooapis.com/v1/public/yql
?q=select%20*%20from%20weather.forecast%20where%20woeid%20in%20(select%
20woeid%20from%20geo.places(1)%20where%20text%3D%22' + location + '%22)&
format=json&env=store%3A%2F%2Fdatatables.org%2Falltableswithkeys';
      request({
        url: weatherEndpoint,
        json: true
      }, function(error, response, body) {
        try {
          var condition = body.query.results.channel.item.condition;
          sendTextMessage(sender, "Today is " + condition.temp + " and "
+ condition.text + " in " + location);
        } catch(err) {
          console.error('error caught', err);
          sendTextMessage(sender, "There was an error.");
        }
      });
    }
  }
  res.sendStatus(200);
});
This code initiates a call to Yahoo’s servers with the incoming message, and returns the current weather for that location.
So the bot would respond to your query. You enter the name of a region or a place for example Boston, Chicago and the bot will give you the forecast of that place.

This is all that I have been experimenting on foe the past few days. I would like to make it more intelligent by using the NLP (Natural Language Processing) api also called wit.ai . It helps in recognising text patterns entered by the user, that said it makes the bot more intelligent and user friendly. As soon as I am done with it I will publish that too sometimes in my next blog.
Till then keep exploring 😉 and keep learning 😀
